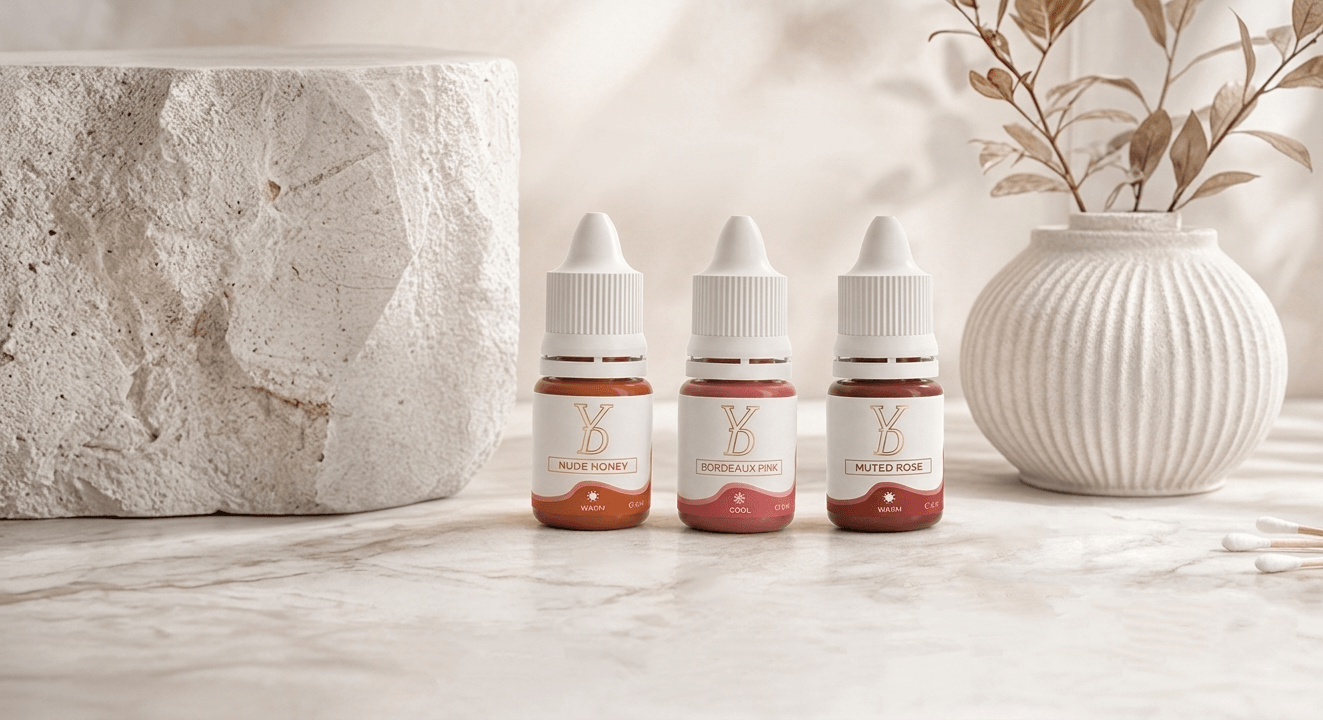

Quick answer: If lip blush pigment appears not to be going in, do not immediately increase machine output, needle protrusion, pressure or the number of passes. First check the pigment, cartridge loading, machine-cartridge compatibility, hand movement, stretch, tissue condition and the way fresh color is being judged. Slow visible saturation is a system problem—not proof that the artist needs to work deeper.
Why Isn't Lip Blush Pigment Going In?
Lip blush pigment may appear slow to saturate when the cartridge is not loading consistently, the needle contacts are too widely spaced, the hand movement does not match the machine, the tissue is poorly stretched, or swelling and natural lip color make the result difficult to read.
The phrase “pigment won't go in” can also describe several different problems. The color may wipe away during the procedure, look faint under surface moisture, appear uneven in one zone, or heal lighter than expected. These observations do not have one automatic solution.
What Does “Pigment Won't Go In” Actually Mean?
Before changing the setup, define the exact symptom. A vague description leads to random adjustments.
| What the Artist Observes | What It May Mean | What to Check First |
|---|---|---|
| Very little pigment reaches the cartridge tip | Loading, product preparation, cartridge resistance or compatibility issue | Product instructions, pigment cup, cartridge fit, membrane movement and loading method |
| Pigment is visible at the tip but wipes away from the lips | Irregular contact pattern, unstable stretch, fast movement, poor angle or surface residue | Practice mark, hand path, contact consistency and wiping method |
| Some lip zones build color while others remain faint | Differences in access, tissue, natural pigmentation, movement or overlap | Zone-by-zone pattern, corners, border, upper lip, swelling and natural base |
| Fresh color looks strong but heals light or uneven | Fresh surface pigment was mistaken for stable implantation, or distribution was inconsistent | Healed photographs, procedure record, pigment map and tissue condition |
| Every setup suddenly performs inconsistently | Equipment, cartridge, power, product or preparation problem | Stop, replace the single-use cartridge when appropriate, inspect the machine and test the complete setup |
Do not use one symptom as proof of implantation depth. As explained in the YDPMU Lip Blush Needle Depth Guide, visible protrusion, machine stroke and actual pigment implantation are different parts of the working system.

Start with the Intended Healed Result
“More saturated” is not always the correct goal. A soft aquarelle lip, a defined full-lip finish and a staged neutralization plan require different distributions of color.
Before working, define:
- the intended healed hue;
- the desired density and transparency;
- whether the natural lip base should remain visible;
- whether the procedure is a finished-color session or a corrective stage;
- which zones need more or less coverage; and
- what level of change is realistic for the assessed tissue.
An artist who has not defined the healed finish may keep adding pigment simply because the fresh result does not resemble opaque lipstick. Lip blush is placed into living tissue; it should not be judged as a surface cosmetic coating.
How the Natural Lip Base Changes Visible Saturation
The lip vermilion is thin and highly vascular. Its visible color varies with natural pigmentation, blood flow and tissue structure. The NCBI overview of lip anatomy explains that the vermilion is a modified mucous membrane and that its color can range from reddish-pink to brown.
This matters because the same pigment does not create the same immediate appearance on every client.
- A pale natural base may show a soft pink quickly.
- A cool, brown, purple or uneven base may visually modify the same shade.
- Residual PMU can change both color and apparent density.
- Temporary redness can make a warm pigment look stronger.
- Swelling can change the surface angle and the way light reflects from the lips.
If the visible base requires correction, repeatedly applying a finished pink shade may increase material without solving the color relationship. Read What Is Lip Neutralization? for the separate assessment and color-planning framework.
Important: Natural lip tone influences how color is seen. It does not tell the artist to increase depth, pressure or repetition.
Pigment Selection: Shade Is Only One Variable
Artists often describe one formula as “easy to implant” and another as “slow.” The observation may be useful, but it should be documented within the exact working setup.
Pigment behavior may be influenced by:
- the product's intended application;
- formula flow and concentration;
- the shade and colorant combination;
- settling during storage;
- the manufacturer's preparation instructions;
- approved mixing or dilution directions;
- cartridge geometry and reservoir design; and
- how frequently the artist reloads.
A more fluid formula is not an instruction to work deeper. A more concentrated formula does not guarantee better healed retention. “Organic,” “inorganic” and “hybrid” are broad pigment categories; none of these words establishes a universal machine setting or pass count.
For custom color work, record the exact formula, shades and mixture instead of relying on a visual estimate. The PMU Pigment Mixing Guide explains ratio control, modifiers, dilution and record-keeping in more detail.
How to Check Pigment Preparation and Cartridge Loading
When color appears faint, inspect the delivery path before changing the machine output.
- Confirm the exact product. Check the label, shade, batch or lot, packaging condition, expiry or period information, and intended use.
- Prepare it as directed. Follow the current product instructions for shaking, mixing or other preparation. Do not assume every formula is prepared the same way.
- Dispense a fresh working portion. Use a clean, appropriate pigment cup. Do not return used pigment to the original container.
- Inspect the cartridge. Confirm that it is intact, sterile, single-use, correctly installed and compatible with the machine.
- Load according to the system protocol. Confirm that pigment reaches the working end consistently without abnormal bubbling, drying or splashing.
- Test before treatment. Check the mark on a suitable practice surface using the identified machine, cartridge and pigment.
- Reload consistently. Do not wait until an almost-dry cartridge produces weak marks before reloading.
Never add water, saline, mixing solution or another product unless it is permitted for the exact pigment and professional use. An unapproved addition can change handling without solving the original cause.
Signs that loading may be part of the problem
- The first movement contains color but the following marks become faint quickly.
- The pigment remains in the cup but does not wet the working end consistently.
- One cartridge repeatedly behaves differently from cartridges of the same identified configuration.
- The tip accumulates dried residue.
- The mark alternates between dry, flooded or splattered.
- The machine sound changes after loading.
If the equipment behaves abnormally, stop the test. Do not compensate by increasing pressure or output.

Needle Configuration Changes More Than Coverage
A single-point cartridge and a wider grouping create different contact footprints. They may also differ in pigment capacity, membrane resistance, stability and the hand movement required to create an even field.
| Configuration Direction | What Changes | What It Does Not Guarantee |
|---|---|---|
| Single point | Small contact footprint and detailed control | Faster saturation, finer healed color or less tissue stress |
| Small multi-point grouping | Coverage, resistance and pigment distribution across several points | Perfectly even density or a fixed reduction in working time |
| Broader grouping | Larger working footprint and different contact demand | That every point contacts curved lip tissue equally |
| Dedicated alternating or synchronized system | System-specific needle movement and working pattern | That settings can be copied from a standard cartridge machine |
A wider grouping is not simply a faster version of a single needle. On a curved or poorly stretched surface, only part of a larger grouping may contact the lips consistently. Changing the cartridge may require changes to movement, overlap and the complete machine setup.

Machine Output and Hand Speed Must Work Together
Machine output affects motor operation. Hand speed affects how needle contacts are distributed along the movement path. Neither one independently determines implantation depth or healed retention.
If the hand moves quickly relative to the active machine-cartridge system, contacts may be spaced too far apart to create the intended density. If the hand moves too slowly, contacts may become crowded and repeated in a small area.
This does not create a rule to “slow down for more color.” The artist must also consider:
- machine model and power format;
- mechanical stroke;
- cartridge configuration and resistance;
- visible protrusion;
- movement length and pattern;
- pressure and angle;
- stretch and lip curvature; and
- current tissue response.
Two machines showing the same voltage can behave differently. Some devices use manufacturer-defined levels rather than voltage. Use the YDPMU PMU Voltage Settings Guide to build a recorded practice baseline instead of copying a number from another artist.
Stretch, Angle and Contact Consistency
Lips are curved, mobile and divided into several working zones. A setup that makes an even mark on flat practice material can perform differently at the cupid's bow, corners, upper lip and center of the lower lip.
Controlled stretch helps the artist see the surface and maintain a repeatable movement path. However, “more stretch” is not always better. Excessive pulling can distort the planned shape and make it difficult to judge where color has already been placed.
Angle also affects contact. When the handpiece tilts or changes direction without control, the working footprint can change. This is especially important with multi-point configurations because not every point may contact a curved surface equally.
Before increasing saturation, ask:
- Can the artist see the complete working zone?
- Is the stretch stable during the full movement?
- Does the handpiece angle change at the beginning or end of the stroke?
- Are movements consistent in length and direction?
- Are adjacent paths spaced intentionally?
- Is pigment residue hiding the true contact pattern?
Why Pressure Is Not the Fix for Slow Saturation
Pressure is one part of tissue interaction. It is not a reliable control for forcing pigment into the lips.
Increasing pressure without identifying the cause can increase repeated tissue stress, distort movement and reduce the artist's ability to read the surface. The same problem applies when an artist increases protrusion because pigment wipes away.
A better sequence is:
- Check pigment preparation and loading.
- Confirm cartridge compatibility and condition.
- Test machine response on a suitable practice surface.
- Review hand rhythm, stretch and angle.
- Assess whether the selected configuration matches the working zone.
- Reassess the tissue before any further pass.
If the problem cannot be resolved within the artist's training and product protocol, the correct decision is to stop—not to keep adding pressure.
How Swelling Changes the Artist's View
Temporary swelling may occur after a skin-breaking procedure. As the tissue changes, the original mapping, surface angle and visible color can become harder to assess.
Swelling can create two opposite mistakes:
- The artist may believe an area is more saturated because redness increases the visible color.
- The artist may believe an area is under-saturated because the stretched, swollen surface reflects more light.
Neither visual impression proves retention. Compare clean sections under consistent lighting, use the procedure map and watch the overall tissue response.
Stop and reassess: Rapidly increasing swelling, unexpected bleeding, loss of a clear surface, splitting, visible abrasion, unstable equipment or repeated passes without controlled improvement are reasons to pause. If control cannot be restored, end the procedure within the artist's professional protocol.
How Many Passes Does Lip Blush Need?
There is no universal number of lip blush passes. One artist's “pass” may cover the entire lip once. Another may use the word for one small zone, one direction or one layer of overlapping movements. The units are not comparable.
The appropriate stopping point depends on:
- the intended healed density;
- the natural lip base;
- the pigment and cartridge;
- the machine and movement pattern;
- coverage already created;
- tissue response; and
- whether the artist can still work with clear visibility and control.
More passes do not guarantee more healed color. Repeating the same area can add cumulative tissue stress while making the fresh result harder to interpret.
Use a coverage map, not a pass target
Divide the planned area into clear zones. After each controlled section, record where coverage is even, light, dense or uncertain. Revisit only the zones that can be treated responsibly.
This is more useful than deciding in advance that every client needs a fixed number of passes.
Fresh Saturation Is Not Healed Retention
Fresh lip blush can look dark, glossy and highly contrasted. This appearance may include implanted pigment, surface residue, natural redness, temporary inflammation, swelling and moisture.
Healed color should be assessed after the expected surface changes have settled and at the artist's normal review point. Read the PMU Healing Stages Guide for the broader recovery framework.
| Fresh Observation | What It Can Show | What It Cannot Prove |
|---|---|---|
| Strong color immediately after wiping | Visible color at that moment | Exact healed hue or retention |
| Glossy, dark surface | Moisture, residue and fresh contrast | That the lips need no healed review |
| One pale-looking zone | A possible coverage difference | That the zone must immediately receive another pass |
| Temporary redness around the border | A fresh tissue response | That pigment has migrated |
| Even fresh color | Controlled immediate appearance | Perfectly even healing |
If the healed result is uneven, use the Why Does Lip Blush Heal Patchy? guide to separate normal surface changes from true gaps, unwanted undertone and unsuitable additional work.

Lip Blush Saturation Troubleshooting Matrix
| Symptom | Review These Variables | Do Not Automatically |
|---|---|---|
| Practice marks start strong and fade quickly | Loading volume, reload timing, dried residue, cartridge condition and pigment preparation | Increase pressure |
| Practice marks are consistently too light | Machine response, hand speed, cartridge resistance, pigment flow and test method | Assume the machine must run at its highest setting |
| Color builds in the center but not at the corners | Access, stretch, angle, surface curvature, moisture and movement length | Use the same hand position for every zone |
| A wider grouping leaves broken coverage | Whether the full grouping contacts the curved surface, handpiece angle and overlap | Assume every needle point is contacting equally |
| Pigment splashes or floods the surface | Loading method, cartridge fit, pigment at the tip, machine response and hand angle | Keep working through abnormal equipment behavior |
| The lips become harder to read during the session | Swelling, redness, wiping, residue, lighting, repeated overlap and tissue condition | Chase an opaque lipstick appearance |
| Fresh color is even but the healed result is light | Healed photographs, natural base, implantation distribution, pigment record, aftercare and client factors | Promise that more passes will solve retention |
| One cartridge behaves abnormally | Cartridge integrity, lot, installation and compatibility | Compensate with more output or pressure |
A Controlled Practice-Skin Test
Practice material cannot reproduce living lip tissue, but it can help isolate mechanical and movement problems before a client procedure.
- Identify the complete setup. Record machine, power source, stroke, cartridge, protrusion reference, pigment and practice material.
- Prepare and load consistently. Use the same approved product method for every comparison.
- Create a baseline strip. Use one defined movement length, direction and hand rhythm.
- Repeat it unchanged. Confirm that the result can be reproduced before changing anything.
- Change one variable. Adjust one permitted control, cartridge or movement factor at a time.
- Compare the pattern. Look at density, spacing, edges, residue, splashing and consistency.
- Save only repeatable results. One attractive mark is not a reliable baseline.
A practice result does not prescribe a client setting. The artist must still assess living tissue and work within professional training, product instructions and locally applicable requirements.
Choosing a YDPMU Lip Pigment System
Product selection should begin with the intended healed color and procedure—not a promise that one formula will “go in faster.”
| YDPMU System | Professional Planning Role | Important Boundary |
|---|---|---|
| NEO Organic Professional Lip Blush Pigment Set | Finished lip color planning across selected natural, pink, coral and stronger color directions | Shade selection still depends on the natural base, previous PMU and desired healed result |
| Powder Hybrid Nude Lip Pigments | Warm and cool nude, rose, berry, terracotta and mauve color planning | A nude bottle color does not guarantee the same healed appearance on every lip base |
| NEO Dark Lip Neutralization Set | Purpose-selected color options for professionally assessed dark or cool lip correction workflows | Neutralization is not selected only because a finished color looks faint during treatment |
Confirm the exact bottle, shade, intended use, packaging, lot information and destination-market documentation before use. Formula properties affect handling, but no pigment can guarantee a fixed pass count, healed color or retention period.
Choosing a Lip Blush Machine System
A machine should be evaluated with its compatible cartridge and trained movement. Different systems should not be treated as if their settings are interchangeable.
YDPMU LipMaster CTM107
The YDPMU LipMaster CTM107 is a dedicated corded lip PMU platform. It uses a fixed 2.0mm mechanical stroke, 18 manufacturer-defined speed levels and proprietary LipMaster cartridges in 1P, 2P, 3P, 4P, 6P and 8P configurations.
Its wider configurations provide different working footprints; they do not establish a universal speed, pressure or pass count. Standard universal-style cartridges are not compatible with the LipMaster handpiece.
YDPMU Blush Pro CTM119
The YDPMU Blush Pro CTM119 uses a dedicated 4P alternating-needle system for professional pigment-placement workflows. Its movement and contact pattern should be learned as one complete system.
An alternating 4P configuration does not mean that color will enter four times faster than with a single-point cartridge. Coverage depends on contact, movement, loading, pigment, tissue and the artist's trained control.
System rule: Do not transfer a voltage, speed level, protrusion reference or hand rhythm from one machine-cartridge platform to another without controlled testing and training.
When Should the Procedure Be Postponed or Stopped?
Lip blush is an elective cosmetic tattoo procedure. Do not continue simply because the planned saturation has not been reached.
Postpone the procedure when the treatment area has active irritation, open sores, suspected infection, an unexplained lesion or another condition that requires assessment outside the artist's scope.
During the procedure, stop and reassess if there is:
- rapidly increasing or unexpected swelling;
- unexpected bleeding;
- splitting, tearing or visible abrasion;
- loss of a clear working surface;
- pigment spreading outside the planned area;
- repeated work without controlled improvement;
- abnormal machine or cartridge behavior; or
- a sudden concerning change in the client's condition.
The U.S. Food and Drug Administration's permanent makeup fact sheet discusses risks including infection, allergic reactions, granulomas and keloid formation. A medical review of tattoo and permanent makeup complications also describes allergic reactions and infections among possible adverse outcomes.
Persistent or worsening pain, spreading redness, unusual discharge, fever, intense swelling, blisters, breathing difficulty or another concerning reaction requires qualified medical assessment. The artist should not diagnose the condition online or attempt to solve it by adding more pigment.
Common Lip Blush Saturation Myths
| Claim | More Accurate Explanation |
|---|---|
| Raise the voltage if pigment will not go in | Check loading, cartridge, machine response, movement, stretch and tissue first. Output is not a direct depth control. |
| Press harder for better retention | More pressure does not create predictable implantation and may reduce control. |
| Use more passes until the lips look like lipstick | Fresh opacity is not a universal lip blush endpoint, and repeated overlap can increase cumulative tissue stress. |
| A wider needle always saturates faster | A wider footprint also changes resistance, angle, contact and movement. It does not guarantee equal contact on curved tissue. |
| 4P is four times faster than 1P | The number of points does not convert directly into working speed or healed retention. |
| Dark fresh color proves strong healed retention | Fresh color can include surface residue, redness, moisture and swelling. Healed assessment is still required. |
| One pass count works for every client | A pass is not a standardized unit. Tissue, design, pigment, setup and coverage differ. |
| More concentrated pigment always heals better | Concentration may affect handling and visible color, but it does not guarantee retention or establish a safe technique. |
Build a Repeatable Lip Blush System
Compare YDPMU lip pigment, machine and cartridge systems as coordinated professional tools. Record the exact setup, test one variable at a time and judge results after healing—not only from fresh color.
Frequently Asked Questions
Why is my lip blush pigment not going in?
The cause may involve pigment preparation, cartridge loading, machine-cartridge compatibility, hand speed, stretch, angle, contact pattern, tissue condition or the way fresh color is being judged. Do not assume the problem proves that the artist needs to work deeper.
Should I increase voltage when lip pigment wipes away?
Not automatically. First check whether pigment is loading consistently, whether the cartridge is functioning correctly, whether the hand movement matches the machine and whether the surface is clearly visible. Voltage or output is not a direct control for implantation depth.
How many passes are needed for lip blush?
There is no universal pass count. The term “pass” is not standardized, and the correct stopping point depends on the intended healed density, coverage already created, natural lip base, setup and tissue response.
Does a wider needle grouping make lip blush saturate faster?
It may cover a wider area, but it also changes resistance, contact and the movement required. A wider grouping does not guarantee faster working, even contact, less tissue stress or better healed retention.
Can I dilute lip blush pigment if it is not loading well?
Only use a diluent or mixing product when it is compatible with the exact pigment and permitted by the product instructions and professional protocol. Do not add water or an unapproved liquid to solve a loading problem.
Why does lip blush look saturated fresh but heal light?
Fresh appearance can include implanted color, pigment residue, natural redness, swelling and moisture. The healed result also depends on pigment distribution, tissue response, healing, aftercare and individual factors. Fresh darkness cannot guarantee healed retention.
When should an artist stop trying to add more color?
Stop and reassess when visibility or control is lost, swelling rises quickly, bleeding is unexpected, the tissue splits or becomes abraded, equipment behaves abnormally, or repeated passes do not create controlled improvement. End the procedure if the issue cannot be resolved within the artist's professional protocol.
Conclusion
When lip blush pigment appears not to be going in, the safest professional response is not to make one aggressive adjustment. Define the symptom, then inspect the complete system.
Check the natural lip base, pigment selection, product preparation, cartridge loading, machine response, hand movement, stretch, angle, coverage map and tissue condition. Change one controlled variable at a time and keep a complete procedure record.
Most importantly, do not confuse dark fresh color with successful healed retention. The goal is a planned healed result created with controlled pigment distribution—not the maximum color that can be made visible during the appointment.